Saturday, February 12, 2011

Make it Monday Challenge take 3

Attempt no. 3 for a 'go-to sentiment' card inspired by Erin Lincoln's video for PTI which you can find here.


I think this is my favourite. It was a bit painstaking to cut out those outline alphabets, but oh so worth it :) I had the fan on and it blew the 'b' off my desk, I was about to give up searching for it and do another one when I finally found it. Phew!

Supplies
Stamps: Papertrey Ink Outline Alphabet, Mega Mixed Messages, Blooming Button bits, Everyday Button bits, Fillable Frames #5
Card: Crate Paper Snow Day collection, Echo Park summertime collection, PTI cardstock sweet blush, summer sunrise, aqua mist, simply chartreuse
Ink: Versafine black, versamark
Other: PTI Beautiful Blooms dies, simply chartreuse felt, white embossing powder, buttons, white embroidery thread.

Friday, February 11, 2011

PTI Button Challenge

Oh dear. Yet another set of delicious PTI dies for my wishlist. Those buttons are adorable and I just want to create lots :)

So here is my button card for the challenge- the button bits stamps series are one of my favourites, they are so much fun!


This card is all about super simplicity and lots of empty space- I want the focus to be on the sweet buttons. Perfect for the one yr old birthday party we are going to tomorrow.

Supplies
Stamps: Papertrey Ink Blooming Button Bits, Tea for Two Additions
Card: PTI spring moss
Ink: PTI ripe avocado, versamark
other: white embossing powder, white thread, sewing machine.

Thursday, February 10, 2011

Make it Monday Challenge take 2

What an inspirational first video from Erin Lincoln. You can watch it here. I really enjoyed this second attempt at a 'go to sentiment' card b/c the design just kinda struck me while I was working on a different idea. Love that.


I'm always trying to build up more masculine cards in my stash, and I really like how this one is fun enough for a kid, but the sentiment is stylish enough for an adult- versatility rocks!

Supplies
Stamps: Papertrey Ink Outline Alphabet, Wreath for All Seasons, Mega Mixed Messages
Card: PTI Summer Sunrise, Ripe Avocado; Cosmo Cricket togetherness mini deck
Ink: Versafine onyx black
Other: PTI terracotta tile felt, various buttons

PTI Colour Challenge

I often get stuck in a colour rut and go back to my tried and true combos, which is great for a last minute card, but sometimes trying something new is a great mojo kickstart. So I was excited to try this colour combo as suggested by Jessica Witty


And here is my take on it


Keep those Colour Combo downloads coming, PTI!

Supplies
Stamps: Papertrey Ink In Bloom, Blooming Button Bits
Card: PTI aqua mist, summer sunrise, rustic white
Ink: Hero Arts shadow ink soft pool, soft sand
Other: PTI rustic twine, buttons

Wednesday, February 9, 2011

Great to get stamping again

How did I get this far into 2011 without doing any papercraft? I blame the seductive powers of yarn and a brand shiny new hobby. I was definitely in need of some inspiration and motivation...

The Papertrey Ink anniversary celebrations are just what I needed- especially the very first Make It Monday video from PTI. I really like the mix & match sentiment idea (I'm a font junkie) so jumped at the chance to get out the stamps. My first attempt is the perfect birthday card for a girl who likes her bling!


I don't have any larger sentiments that would work well as the focal point, so created my own using the outline alphabet set. LOVE that alphabet. Had some more ideas while I was doing this one, so I'll be back with more soon!

Supplies
Stamps: All Papertrey Ink- Outline Alphabet, Wreath for All Seasons, Round & Round, Mega Mixed Messages
Cardstock: PTI plum pudding
Ink: PTI snowy white pigment ink, versamark
Other: Signo silver gel pen, double sided tape, Prisma glitter, silver embossing powder, rhinestone.

Friday, November 26, 2010

Papertrey November Blog Hop challenge: Holiday Tags

A big hello to all the PTI blog hoppers! Thanks for stopping by.

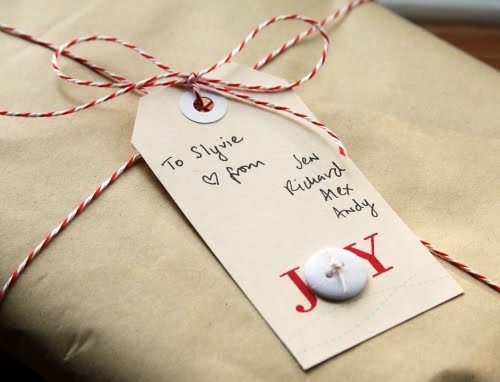
What a wonderful theme this month- holiday tags. So I thought I'd like to share a few quick tag ideas with you, in order of increasing time/technique complexity. First up...

ALL WRAPPED UP IN 60 SECONDS FLAT.


Shipping tags are my gift giving saviours. Cheap, easy to get and so simple.
Stamps: Papertrey Ink 2010 Holiday Tags, Holiday button bits.

NEED SOME WOW RIGHT NOW.


This is all about letting the dies do all the work. The wow comes from the non-traditional colour combo and the gorgeous scallop border with just a touch of glitter.
Stamps: PTI 2010 Holiday Tags
Other: PTI Limitless layers circles die set; cardstock chartreuse, raspberry fizz; Fresh snow pigment ink; prisma glitter; Sakura glue pen.


ELEGANCE WORTHY OF MARTHA.


But no glue gun in sight! The muted palette & tag shape are sophisticated and unisex. The embossed sentiment and acetate window make it a bit more complex and time consuming compared to the first two tags, but worth it don't ya think? Tip: Die cut two tags and cut the window through both layers at the same time so you have an exact match to adhere to the other side (hiding the acetate edges).
Stamps: PTI 2010 Holiday Tags, Holiday Button Bits.
Other: PTI mat stack 3 die, limitless layers circle die set; silver embossing powder; acetate; white Staz On ink; signo white gel pen; PTI silk ribbon.

Enjoy the rest of the blog hop, I'd love a comment if you have the time. Thanks!


Sunday, November 21, 2010

My first shawl & the winner is.....


I got bitten bad by the knitting bug after I started this shawl. It was a really enjoyable knit and now I am afraid that I will start knitting several shawls!

All the details about the pattern and yarn can be found on Ravelry here. The pattern is free by the way- Liz Abinante is one awesome knitter.

Speaking of free things....the giveaway winner picked by random number is SHEREE! Love ya Sheree, just contact me with your postal address so I can send an extra package to go under your tree :)

It is that time of year....GIVEAWAY!


Change is in the air over here, and as Christmas is also upon us I think that calls for a giveaway :) It is kinda my way of saying Merry Christmas to those of you who pop by regularly and also high time I spread the love around.

So, here are the giveaway rules- just leave a comment on this post (one per person please) and a winner will be randomly picked next Thursday. AUSTRALIAN RESIDENTS ONLY. The contents of the package will be a surprise...but there will definitely be stamping goodies in there. Make sure there is a way I can contact you- either through a blog link or email address. Good luck!

Supplies
Stamps: Papertrey Ink A Wreath For all Seasons
Ink: Versamark, Distress Ink fired brick, antique paper
Other: Platinum stickles, American Crafts zing embossing powder leaf.

Tuesday, November 9, 2010

Sylvie's summer dress


Very satisfying to finish a project yesterday- a Christmas present for my niece. The top is knitted and the fabric skirt sewn on.

All the details about the pattern, yarn and fabric can be found on Ravelry here.

Now to tackle the many other things in my queue!

*By the way, I'm going to be doing a giveaway soon, so stay tuned*

Wednesday, October 27, 2010

Garden layout with pocket

Thanks to the lovely Sheree for the design and pocket idea which I scraplifted for this layout. We've been doing a lot more work trying to grow things in our garden lately.


Supplies
Paper, chipboard: Cosmo Cricket Garden Variety
Stickers, journal cards: Echo Park Summertime
Other: DIY mist (distress ink broken china reinker and mica powder), Prima packaging, sewing thread

Monday, October 25, 2010

A card, just because...

It was pretty exciting cracking open my Crate Paper Snow Day collection pack on the weekend and making something with it. Totally unrelated to snow or Christmas, but in my opinion, versatility is one of the fabulous things about this pack.


TIP You know how Spellbinders circle dies leaves a lightly embossiedinner edge on your die cut cardstock circle? I added some glitter using a glue pen- the embossed border is the perfect guide. It gives the impression of an extra layer without one.

Supplies
Stamps: Papertrey Ink Mega Mixed Messages
Ink: Colorbox chestnut pigment ink
Paper: Crate Paper Snow Day, PTI rustic white cardstock
Other: Spellbinders large circle dies; PTI felt, PTI flower die, Prisma glitter; various buttons

Wednesday, October 20, 2010

Pink and green pastels


I find it hard to work with pastel colours usually. But they are great for baby cards. Die cut layers and buttons are basically the features of this card. Simple but classic.

Supplies
Stamps: Papertrey Ink mega mixed messages
Dies: PTI fillable frames #1; Spellbinders labels 4
Paper: Basic Grey
Other: distress ink, PTI twill (ripe avocado)

Thursday, October 14, 2010

A card in ten minutes

Jennifer McGuire does amazing videos. And she has recently started a new stamping series called Holiday Thinking Inking. Visit her blog to find out more.


I used one of the techniques she showed in the most recent video to create the background for this card. I love how quick and easy it was to get a layered look to this plain white cardstock. The whole thing was done and dusted in less than ten minutes. I will say that I think this works best with heavy weight cardstock or watercolour paper. Mine is 300gsm (about as thick as you can get).

Tip: Use a tiny hole punch to make a notch in the side of the card where you want the twine to wrap around- it sits much more nicely in place on the card.

Tuesday, October 12, 2010

Finally, a layout

I've been bitten by the knitting bug quite badly in the last couple of weeks, so scrapbooking has taken a bit of a back seat. But it was nice to get a page done "just because" on the weekend.


Supplies
Paper & chipboard: Crate Paper Brook collection
Other: Basic Grey mini mono stickers; Studio Calico chipboard alpha, fabrips; Jillibean Soup corrugated alpha; paint; My Minds Eye Life Stories journal card.

Sunday, October 10, 2010

Gate fold card


This was a super quick birthday card for a little boy. I rarely do gate fold cards so I was quite stumped for a while, but turning it 180 degrees and adding some felt and stickers made it pretty fun in the end.

Supplies
Cardstock Papertrey Ink aqua mist
Stamps PTI Everyday button bits
Stickers Echo Park Summertime, Sassafras Lass
Other: PTI cloud dies, felt airplane from fun felt set.

Thursday, October 7, 2010

Love is simple

Another World Cardmaking Day challenge at Scrapz.biz, this time a window card theme by Sheree. Dies make easy work of cutting windows in cards and it does jazz up even the most simple design.


I printed the template onto the red cardstock (use the inverted image & print on the back), cut it out and then die cut through all the layers on the card front. The felt heart I just cut freehand.

Supplies
Paper: Basic Grey
Cardstock: Papertrey Ink pure poppy
Tools: Be My Valentine template by Papertrey Ink, felt PTI ocean tides, die Spellbinders.

Tuesday, October 5, 2010

World Cardmaking Day Challenges

There are some great challenges designed to boost your card stash over at Scrapz.biz. Here is one of my entries so far...more to share later.


So many people are in love with the Restoration collection by Crate Paper and I am no exception. I really like the idea of cutting out individual playing cards from the paper and using them as numerical embellishments- this will be a birthday card for a little girl turning two.

I also explored some of the decorative stitches on my sewing machine- stitching just goes so well with this collection.

Supplies
Paper: Crate Paper Restoration
Stamps: Papertrey Ink Just the Ticket
Other: Distress Ink (vintage photo); American Crafts Zing embossing powder (leaf); sewing machine.

Wednesday, September 29, 2010

Cup of Thanks Card

A friend of mine is doing me a big favour this Friday so I've made a card and bought a little gift.


If you have small scraps from a patterned paper collection or in my case, left overs from a 6 inch paper pad, this card format of a die cut repeated over and over is a simple but really effective design. It works best with small scale patterns.


I've had this bunch of tiny jewelry tags for ages but never had stamps small enough to use with them...all solved now!

Supplies:
Stamps- Papertrey Ink Tea for Two Additions
Die- Papertrey Ink teacup
Paper- Pink Paislee Queen Bee 6 inch paper pad
Cardstock- Papertrey Ink smokey shadow
Ink- versafine onyx black
Other- jewelry tag

Saturday, September 25, 2010

Papertrey September blog hop challenge: Sharing the love

This card is all about THANKS. Thanks to all the crafters out there who gladly share their ideas, knowledge and experience with us just for the love of it.


Actually I found this quite a hard blog hop, just because it was a real challenge to pick something to focus on- I mean, everything I know about stamping I have learnt from a fellow stamper so it was kinda hard to narrow down! In the end I decided to go with my latest favourite PTI set and a technique that I haven't seen used around the traps so much lately, so hopefully it will be useful info for someone out there.

The idea is basically to use household bleach as an ink, but particularly on this card it was used inside the stamped outline to bleach out some of the cardstock, which makes it easier to add colour on top later. I think I learnt about this from a magazine quite a while back. It gives a striking effect on dark cardstock.


This shows the letters bleached on the left and unbleached on the right. I stamped the letters using Versafine and heat embossed them with clear powder- this makes it much easier to keep within the outline with both the bleach and the colour. I just used a fine paintbrush dipped in regular household bleach and coloured pencils with dimensional medium over the top (see photo below). The stitching is pure Nichole Heady (I always admire her use of stitching) and the simple use of bold patterned papers is inspired by Kristina Werner.


Thanks for hopping by, and thanks again for taking the time and effort to do tutorials, answer questions, share ideas and give encouragement. You know who you are.

Friday, September 24, 2010

Kaisercraft desk organiser 'Restored"


I've been away on holidays ignoring the blog. BUT it hasn't been a complete papercraft disaster, because it did give me a chance assemble and decorate the Kaiserkraft large desk organiser. I love it, it has completely transformed the top of my telephone cabinet (seriously, I'm too embarrassed to show you before and after photos!)


This is my favourite part of the project, the three small drawers in the center. The knobs are by Tim Holtz. *swoon*. All the papers & die cuts are from Crate Paper Restoration collection.

If you are thinking of making one for yourself, my tips are:
- Assemble all the parts before starting and mark with a pencil the surfaces you want to cover and the edges that will be visible.
- I used a few coats of varnish on undecorated areas that are likely to collect dust.
- Adhesive fabric is fantastic for the thin edges if you don't want to bother with paint.
- I inked the edges of my paper before adhering with Vintage Photo distress ink.
- I found it necessary to use some glue to keep the whole thing together. I find dimensional medium great for this because it has an easy to control tip. I suggest you apply it where needed and lie the organiser on one side, with a small amount of folded newspaper supporting the main side (b/c of the border around the base, it will not lie completely flat on its side). Place some heavy books on top of it and let it dry.

If you have had a go at transforming this desk organiser, I'd love to see it- leave me a link in the comments.